

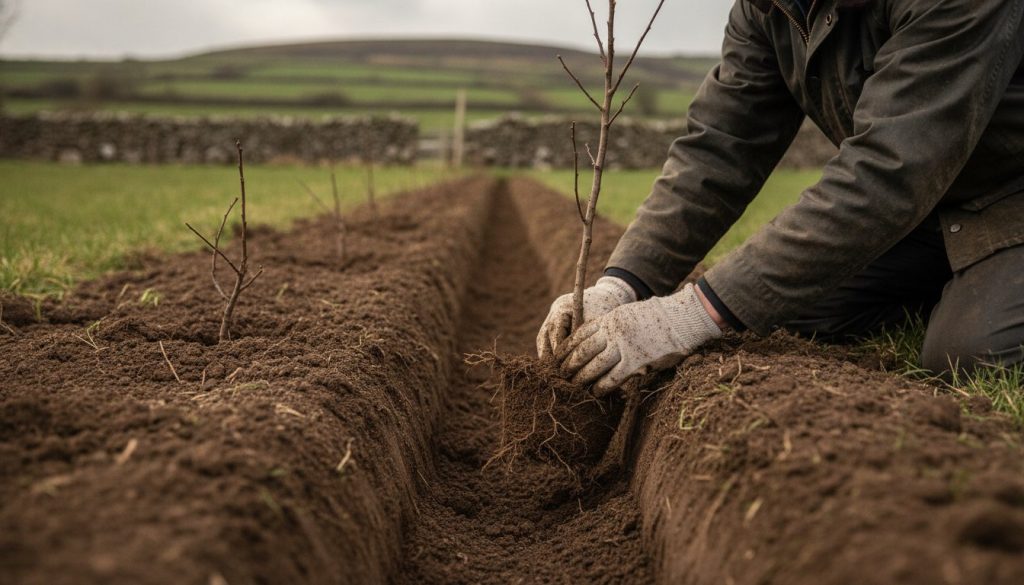
Most gardeners focus on the height of their new hedge, but the real secret to a thick, private boundary happens underground before the first leaf even appears. Choosing bare root plants is the smartest way to save money and establish a deep-rooted hedge, yet many people fear their new saplings won’t survive the first winter. It’s a common worry, especially when you’re dealing with the heavy, wet soil conditions often found across Ireland. You don’t want to see your investment fail after a few months of hard work.
We understand that you want a dense, professional result without the high cost of pot-grown alternatives. This guide will teach you exactly how to plant a bare root hedge using the same methodical techniques we use on our own 60-acre nursery. You’ll learn the professional way to prepare the ground, how to handle delicate root systems, and the specific spacing needed for species like Beech, Hornbeam, or Whitethorn. By following these practical steps, you’ll ensure your new boundary grows into a healthy, vibrant screen that lasts for decades.
Key Takeaways
- The Irish bare root season runs from November to March, providing a vital window to plant hardy, cost-effective boundaries whilst the stock is dormant.
- Protect your investment by following the 48-hour rule, ensuring roots are never exposed to wind or frost and are planted or ‘heeled in’ quickly upon arrival.
- Master the professional method for how to plant a bare root hedge, focusing on trench preparation and finding the original nursery line for perfect depth.
- Select species that suit your specific site, including Beech for year-round privacy or native Whitethorn and Blackthorn for the Native Trees Scheme.
- Promote a thick, healthy boundary from the start by mulching to suppress weeds and pruning back immediately to stimulate growth at the base.
Understanding Bare Root Hedging and the Planting Season
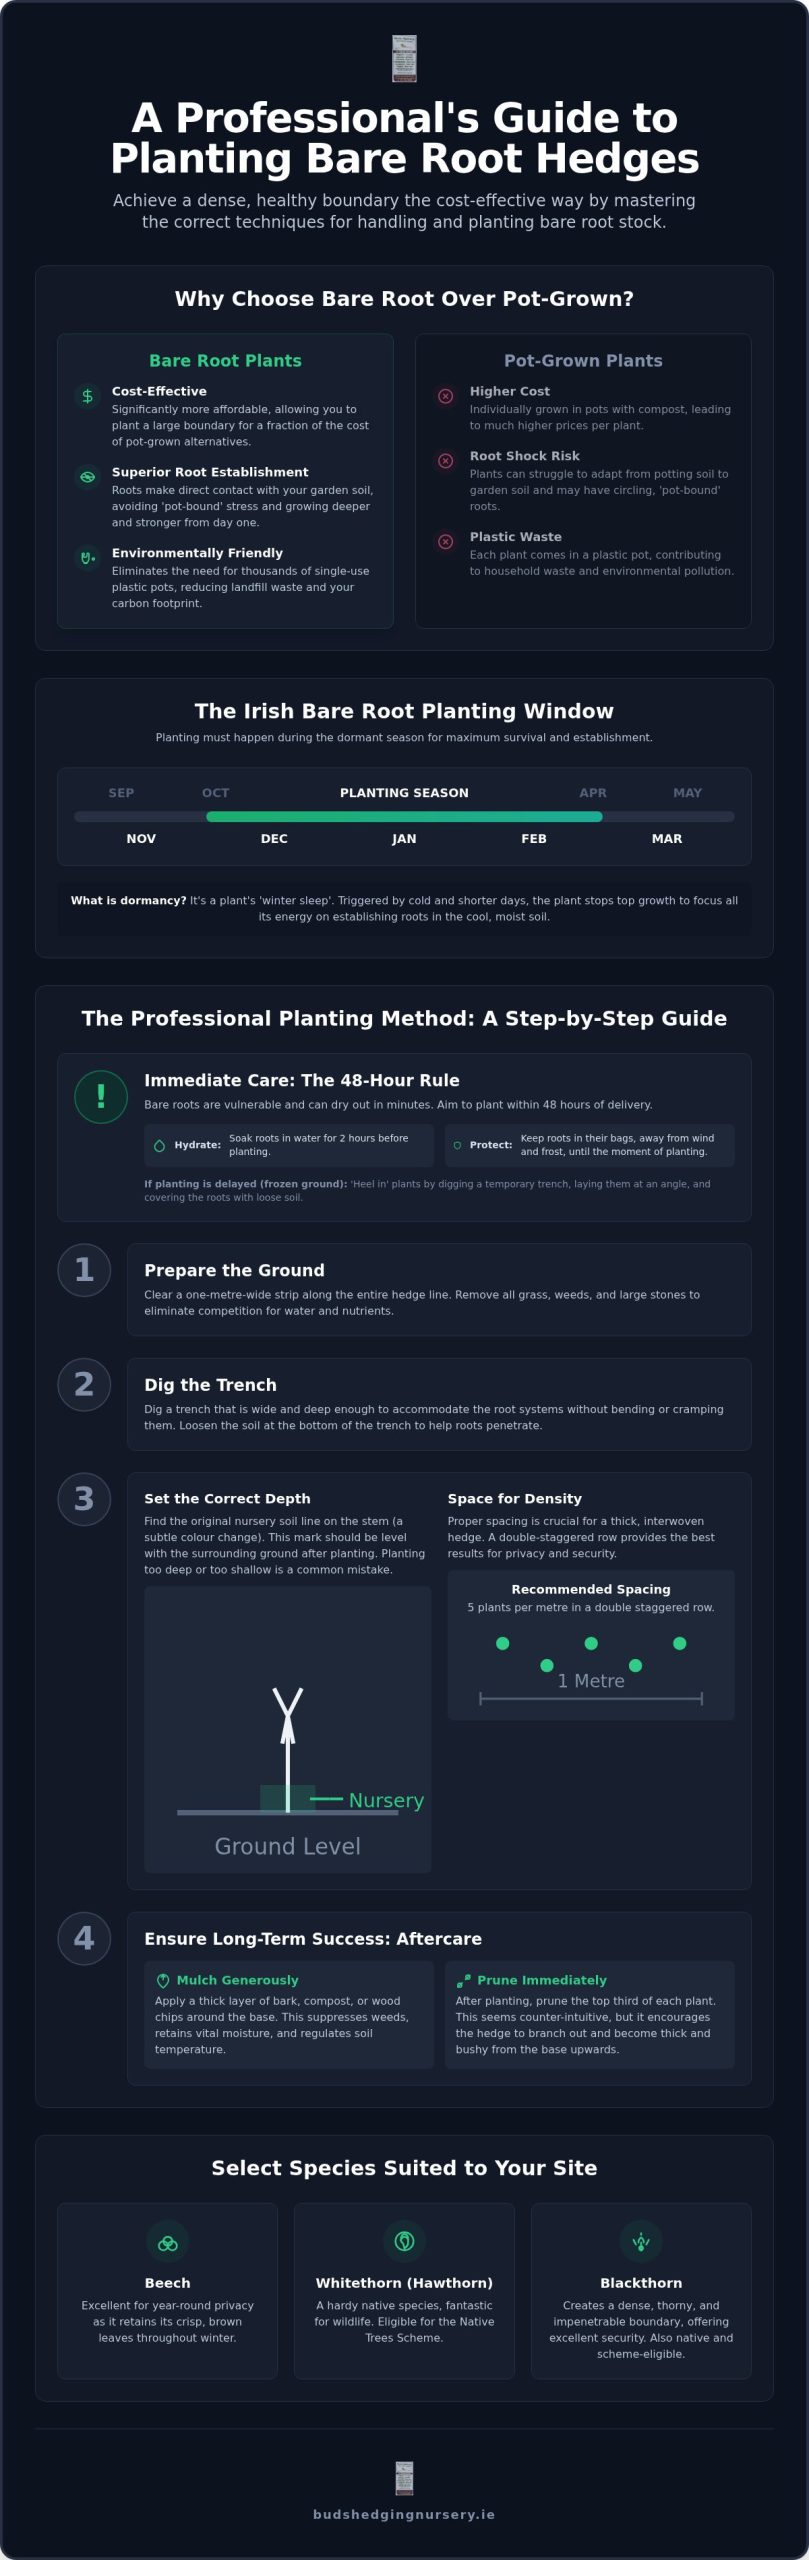
Bare root plants are grown in open ground, lifted whilst dormant, and sold without any soil around their root systems. If you are researching what are bare root plants, it’s helpful to think of them as plants in a temporary state of suspended animation. In Ireland, the bare root season typically runs from November to March. This period coincides with the natural dormancy of deciduous and some evergreen species. Understanding this cycle is essential before you begin learning how to plant a bare root hedge, as timing is the most critical factor for success.
Establishing a hedge this way offers superior root-to-soil contact compared to pot-grown alternatives. When you place a bare root plant directly into a prepared trench, the roots immediately interact with your garden’s native soil. There’s no transition period or “pot-bound” stress to overcome. This leads to a more resilient, deeper-rooted boundary that can better withstand unpredictable Irish weather patterns.
Why Choose Bare Root Over Pot-Grown?
Cost is often the deciding factor for many homeowners. When you have a long boundary to secure, the savings are significant. You can often buy several bare root saplings for the price of a single pot-grown plant. Because they aren’t carrying the weight of heavy compost or plastic containers, handling them is much more efficient for large-scale projects. You can fit hundreds of plants in a standard vehicle, making transport simple and reducing your carbon footprint.
Beyond the financial benefits, there’s a clear environmental advantage. Planting bare root eliminates the need for thousands of single-use plastic pots that often end up in landfill. This “nursery-direct” approach ensures you receive fresh, hardy stock that hasn’t spent months sitting on a retail shelf. When you know how to plant a bare root hedge correctly, you take advantage of these efficiencies to create a dense, healthy screen without overspending.
The Importance of the Dormant Period
Plants enter a state of “winter sleep” where they stop active top growth. This dormancy is triggered by shorter days and cooler temperatures. During this phase, the plant isn’t trying to sustain leaves or flowers, which allows it to focus all its energy on root repair and establishment. Cold Irish soil provides the perfect environment for this process. The moisture in our ground during winter ensures the roots stay hydrated without the risk of drying out in the sun.
The planting window is strictly dictated by the weather and the plant’s behaviour. You must finish your planting before the first buds begin to break in early spring. Once the plant wakes up and starts pushing out new growth, it requires a steady supply of water that a newly moved root system cannot yet provide. By planting whilst the air is cold and the plant is asleep, you give your hedge a massive head start before the growing season begins in earnest.
Preparing Your Site and Handling Bare Root Plants
The success of your new boundary depends heavily on what happens between the nursery delivery and the moment the roots are covered with soil. Many beginners assume the plants are dormant enough to sit in a shed for a week, but this is a mistake. Bare root stock is vulnerable. Its fine root hairs can dry out in minutes if exposed to a cold breeze or frost. Knowing how to plant a bare root hedge starts with understanding that these plants are living organisms that need immediate care during the transition from the nursery to your garden.
Root Protection and Hydration
Follow the strict 48-hour rule. You should aim to have your plants in their permanent positions within two days of arrival. Before you start digging, place the roots in a bucket of water for about two hours. This rehydrates the plant and prepares it for the move. Be careful not to leave them submerged for much longer than this, as you can actually drown the roots by depriving them of oxygen. Keep the plants in their delivery bags until the very second you are ready to place them into the trench.
If the Irish weather doesn’t cooperate and the ground is frozen or waterlogged, you must “heel in” your stock. This involves digging a temporary shallow trench in a sheltered spot, laying the plants in at an angle, and covering the roots with loose soil or compost. This protects them from the elements whilst you wait for better conditions. For more detailed technical steps, you can refer to the Woodland Trust’s planting advice on handling sensitive stock.
Ground Preparation Techniques
Clear a metre-wide strip of all grass and weeds along your intended hedge line. This reduces competition for nutrients and moisture during the critical first year. Use a string line to ensure your hedge stays perfectly straight. In heavy Irish clay, drainage is often an issue. If your soil feels greasy or holds water, incorporate some grit or well-rotted organic matter to improve the structure. Digging a continuous trench is usually more efficient than individual pits. It ensures the soil is loosened evenly, allowing roots to spread out laterally without hitting compacted walls of clay. If you need specific advice on which species suit your soil type, our team at Buds Nursery Cavan can help you choose the right plants from our 60-acre stock.
A Step-by-Step Guide to Planting Your Hedge
With your ground prepared and your plants hydrated, it’s time to get them into the soil. Precision at this stage is what separates a struggling hedge from a thriving one. Start by digging a trench approximately 30cm deep and 30cm wide. This size accommodates the root spread of most standard bare root plants without cramping them. As you work, keep an eye out for the ‘nursery line’ on the stem. This is a visible mark or colour change where the plant previously sat in the nursery soil. You must aim to plant at this exact same depth. Placing them too deep can lead to stem rot, whilst planting too shallow leaves sensitive roots exposed to the air.
Achieving Density with Staggered Rows
A common mistake is planting in a single, thin line. If you want a thick privacy screen that blocks wind and noise, a double-staggered row is the professional choice. This involves planting two parallel rows about 30cm to 40cm apart, with the plants in the second row positioned in the gaps of the first. This ‘W’ pattern creates a much denser structure. Generally, you should aim for 3 to 5 plants per metre. Some species require more room to breathe, so it’s best to consult our hedging plant spacing guide before you begin your layout. This ensures you buy the correct quantity for your specific boundary length.
Professional Planting Technique
When you place each plant in the trench, spread the roots out naturally. They shouldn’t be bunched or curled upwards. Backfill the trench with a mix of the original topsoil and some fine organic matter to provide a nutrient boost. For those looking to naturally optimise soil health, products from GrowQanz can provide a microbial advantage that helps young plants thrive. Once the roots are covered, the ‘firming in’ process begins. Use your heel to press the soil down firmly around the base of each plant. You aren’t trying to compact the ground into concrete, but you must remove any air pockets. These pockets can trap cold air or water, which may freeze and kill the roots during a hard frost.
Selecting the right species for your site is just as vital as knowing how to plant a bare root hedge. If you choose a plant that hates your soil, even perfect technique won’t save it. Green and Copper Beech are the most popular choices for Irish gardens. They offer a formal look and, although deciduous, they retain their copper-coloured leaves throughout the winter if pruned correctly. However, Beech requires well-drained soil. If your garden has the heavy, damp clay common in many parts of the country, Hornbeam is a far more reliable alternative. It looks similar to Beech but is much tougher in wet conditions.
For those with larger boundaries or a focus on wildlife, Whitethorn and Blackthorn are essential. These are core components for the Native Trees Scheme. They provide excellent security due to their thorns and offer a significant boost to local biodiversity. Laurel varieties, such as Cherry Laurel, are the go-to for gardeners needing a fast-growing, evergreen screen. They can grow 30 to 60cm per year, providing a thick wall of green in a short space of time.
Native Hedges for Biodiversity
A mixed native hedge creates a natural, country-style finish that changes with the seasons. By mixing species like Hazel, Holly, and Hawthorn, you create a corridor for birds and insects. We recommend a ratio of about 75% Whitethorn as the structural backbone, with the remaining 25% made up of other native species. This variety ensures that if one species struggles, the others will fill the gap. Many landowners now access regional environmental grants for this type of planting, making it an affordable way to manage large perimeters whilst supporting local ecology.
Evergreen vs Deciduous Bare Root Options
Deciding between evergreen and deciduous species depends on your privacy needs. When you are planning how to plant a bare root hedge for privacy, the choice between year-round foliage and seasonal colour is your first major decision. Portuguese Laurel is particularly well-suited to the Irish climate. It is hardier than common Laurel and handles wind better. Remember that deciduous doesn’t always mean a see-through hedge in winter. Species like Beech or Hornbeam provide excellent screening even after the leaves turn brown. You can find all these varieties and more at our specialist plant nursery.
If you are ready to start your project, you can browse our full range of bare root hedging to find the perfect match for your garden’s soil and aspect.
Ensuring Long-term Success: Aftercare and Maintenance
Planting your saplings is a significant milestone, but the first eighteen months are the most critical for survival. Knowing how to plant a bare root hedge is only half the battle; the aftercare phase determines how quickly those plants become a solid, functional boundary. One of the most effective ways to protect your investment is by applying a thick layer of mulch, such as bark or woodchips, at the base. This suppresses weeds and grass, which would otherwise compete for vital nitrogen and moisture. It also helps the soil retain water during the transition from a wet winter to a potentially dry spring.
Irish winters often bring heavy gales. You must regularly check your new plants for ‘wind rock’ after any major storm. This occurs when high winds sway the young stems, creating a funnel-shaped gap in the soil at the base. These gaps allow frost to reach the roots or water to pool and cause rot. If you notice any movement, simply firm the soil back down with your heel. Additionally, perform a hard prune at the time of planting for deciduous species like Whitethorn or Privet. Cutting the stems back by a third may feel drastic, but it’s a professional-grade technique that forces the plant to produce multiple stems from the base, preventing a thin hedge later on.
The Crucial First Spring
As the weather warms in March, your hedge will begin to wake up. This is the time to apply a slow-release fertiliser to give the plants a boost as they break dormancy. Watch the soil moisture closely during April and May. Even in Ireland, a few weeks without rain can be fatal for a newly established root system. You should also maintain a clear, weed-free strip of at least 50cm on either side of the hedge for the first two years. This ensures every drop of water and every bit of nutrient goes directly to your hedge rather than the surrounding grass.
Pruning for Shape and Density
Formative pruning is essential for building density. Once the first growing season is underway, you can begin to lightly trim the sides to encourage lateral branching. This side-growth is what eventually weaves together to form a secure, stock-proof screen. Avoid cutting the leading vertical shoot until the hedge has reached your desired height. By following a steady maintenance schedule and monitoring growth patterns, you ensure your nursery-direct plants reach their full potential as a thick, healthy boundary for your property. Following these steps is the final stage in mastering how to plant a bare root hedge for long-term results.
Establish Your New Boundary This Season
Successful hedging requires patience and adherence to a few practical fundamentals. By respecting the natural dormant cycle and protecting root systems from exposure as discussed, you ensure your boundary has the best possible start in Irish soil. Density is achieved through the precise spacing and that vital first formative prune we have outlined, whilst consistent mulching protects the plants during their first dry spring. Mastering how to plant a bare root hedge allows you to create a professional-grade screen that is both resilient and cost-effective.
At Buds Nursery Cavan, we provide nursery-direct stock grown on our 60-acre production site. We are specialists in the Native Trees Scheme and offer national delivery across Ireland to ensure your plants arrive in peak condition. Explore our extensive range of quality bare root hedging at Buds Nursery Cavan and secure the right species for your garden. With the right preparation this winter, you’ll soon enjoy a thick, healthy boundary that lasts for decades.
Frequently Asked Questions
Can I plant bare root hedging in waterlogged soil?
You should avoid planting bare root hedging in soil that is actively waterlogged or saturated. When the ground is a slurry of mud, the delicate roots cannot access oxygen and are highly susceptible to rot. It’s better to wait for the water to drain away. If your site is prone to holding water, consider improving the drainage with grit or organic matter before you begin the process of how to plant a bare root hedge.
How long can I keep bare root plants before they must be planted?
Ideally, you should have your plants in the ground within 48 hours of delivery. Bare root stock is lifted whilst dormant and lacks a protective soil ball, making the roots prone to drying out quickly. If you cannot plant immediately due to weather or scheduling, you must “heel in” the plants. This involves placing the roots in a temporary shallow trench and covering them with loose soil to keep them hydrated.
Do I need to use a root stimulant or fertiliser at planting time?
You don’t need to add high-strength fertiliser directly into the planting hole, as this can sometimes scorch young roots. Instead, focus on incorporating well-rotted organic matter into the backfill soil to provide a natural nutrient base. A slow-release fertiliser is best applied as a top dressing in late March or early April. This timing ensures the nutrients are available just as the plants break dormancy and begin their first active growing season.
What is the best way to water a newly planted bare root hedge?
Give the hedge a thorough, deep soak immediately after planting to settle the soil around the roots. For the first year, it’s better to water heavily once or twice a week rather than giving light daily sprinkles. This encourages the roots to grow downwards in search of moisture, creating a more resilient plant. During a dry spring, check the soil moisture levels regularly, as newly planted hedging is vulnerable until the root system is established.
Why are my bare root plants not showing leaves in early spring?
Different species break dormancy at different times, so don’t worry if your hedge looks bare in March. Species like Beech and Hornbeam are often amongst the last to show new leaves, sometimes waiting until late April or May. You can perform a “scratch test” by gently scraping a small piece of bark away with a fingernail. If the tissue underneath is green and moist, the plant is healthy and simply waiting for warmer weather.
How many plants do I need per metre for a thick hedge?
For a standard boundary, you typically need between 3 and 5 plants per metre. The exact number depends on the species you choose and the initial size of the saplings. If you are using smaller whips, planting 5 per metre ensures a dense finish more quickly. When learning how to plant a bare root hedge for maximum privacy, using a higher density in a staggered layout is the most effective way to block lines of sight.
Is it better to plant in a single row or a double row?
A double-staggered row is almost always better if you want a thick, secure hedge. By planting two parallel rows and offsetting the plants in a “W” pattern, you create a much deeper barrier that provides better wind protection and privacy. A single row is usually reserved for very tight spaces where there isn’t enough room for a wider trench. Double rows also provide a better habitat for nesting birds and local wildlife.
Can I plant bare root hedging if there is a frost forecast?
You can plant bare root hedging if a frost is forecast, provided the ground is not already frozen solid. It’s impossible to dig a proper trench in frozen earth, and large frozen clods of soil will create air pockets around the roots. If the ground is workable, go ahead with the planting, but ensure the soil is firmed in well. If a severe, deep freeze is expected for several days, it’s safer to wait.