

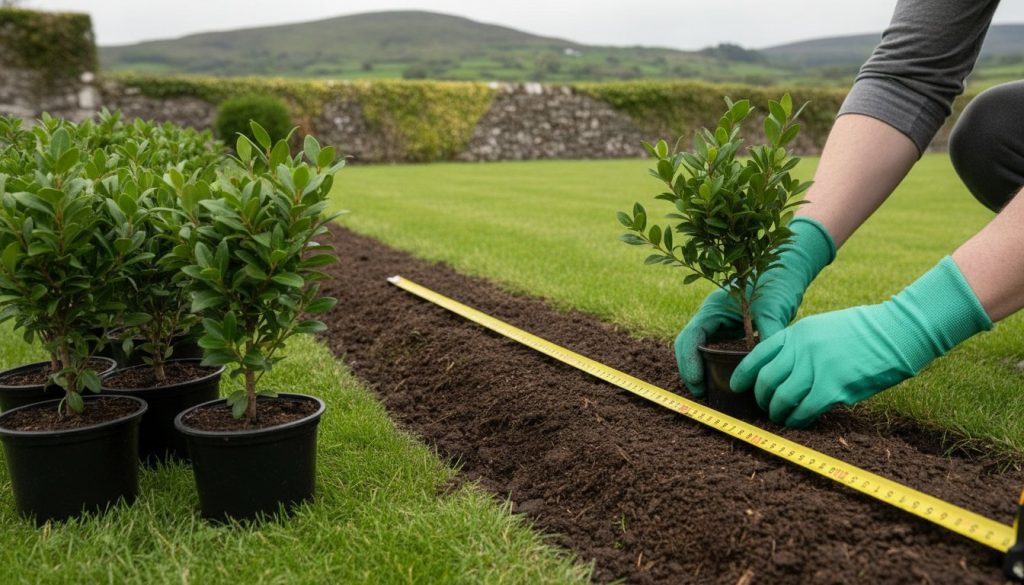
Buying too many plants is a waste of money, but buying too few results in a patchy, thin screen that fails to provide the privacy you need. Getting the density right is the most critical step in any planting project. This hedging plant spacing guide provides a practical framework to help you calculate exactly how many specimens you need per metre. Whether you are planting Portuguese Laurel for a formal look or Copper Beech for a seasonal colour shift, the right distance between plants ensures your hedge remains healthy and vigorous for decades.
It’s understandable to feel confused by conflicting advice, especially when balancing a budget against the desire for an instant screen. We agree that a professional finish shouldn’t require guesswork. This guide will teach you how to master the calculations for various species and root types. We will look at the Teagasc recommendation of six plants per metre for double staggered rows, explain how to adjust for larger pot-grown varieties like Cherry Laurel or Hornbeam, and help you build a precise shopping list. By the end, you’ll have a cost-effective strategy for a dense, professional-looking hedge.
Key Takeaways
- Understand the biological trade-offs of density to prevent nutrient competition and ensure your hedge doesn’t become leggy or thin at the base.
- Learn how to adjust your strategy based on root types, as bare root whips and mature pot-grown specimens require different initial distances.
- Use our species-specific hedging plant spacing guide to find the ideal density for popular Irish garden choices like Portuguese Laurel, Beech, and Hornbeam.
- Identify when to use a single row for narrow borders versus a double staggered row for creating the thickest, most secure privacy screens.
- Master professional establishment techniques, such as digging a continuous trench instead of individual holes to encourage superior root spread.
Understanding Hedging Plant Spacing: Why Density Matters
Planting density is the specific number of individual plants required per linear metre to create a solid, functional boundary. It isn’t a random figure; it’s a calculation that determines the long-term health and appearance of your garden. When you follow a professional hedging plant spacing guide, you’re balancing the immediate need for privacy with the biological requirements of the species you’ve chosen. For those interested in the broader context of these living structures, you can find an encyclopedic overview of hedges that details their historical and ecological importance.
Getting the density right from the start prevents the common problem of “leggy” growth. This occurs when plants are forced to compete for limited soil nutrients and light. Instead of growing thick and bushy at the base, the stems stretch upwards, leaving unsightly gaps at the bottom of the hedge. A well-spaced boundary also provides superior structural integrity. In exposed Irish gardens, a hedge acts as a vital windbreak. If the plants are too sparse, the wind tunnels through the gaps; if they’re too cramped, they may fail to develop the deep, stable root systems needed to withstand stormy weather or coastal salt spray.
The Balance Between Speed and Plant Health
The temptation to plant as close together as possible for “instant” privacy is a common mistake. Overcrowding significantly restricts airflow amongst the foliage. This lack of ventilation creates a humid microclimate where fungal issues, such as powdery mildew or leaf spot, can thrive. Species like Portuguese Laurel and Green Beech require room to breathe as they mature. Most common hedging varieties have a natural spread that develops over a three-year period. Proper spacing allows roots to establish without competing for limited soil moisture, ensuring the hedge remains vigorous rather than stunted.
Economic Considerations: Budgeting Your Boundary
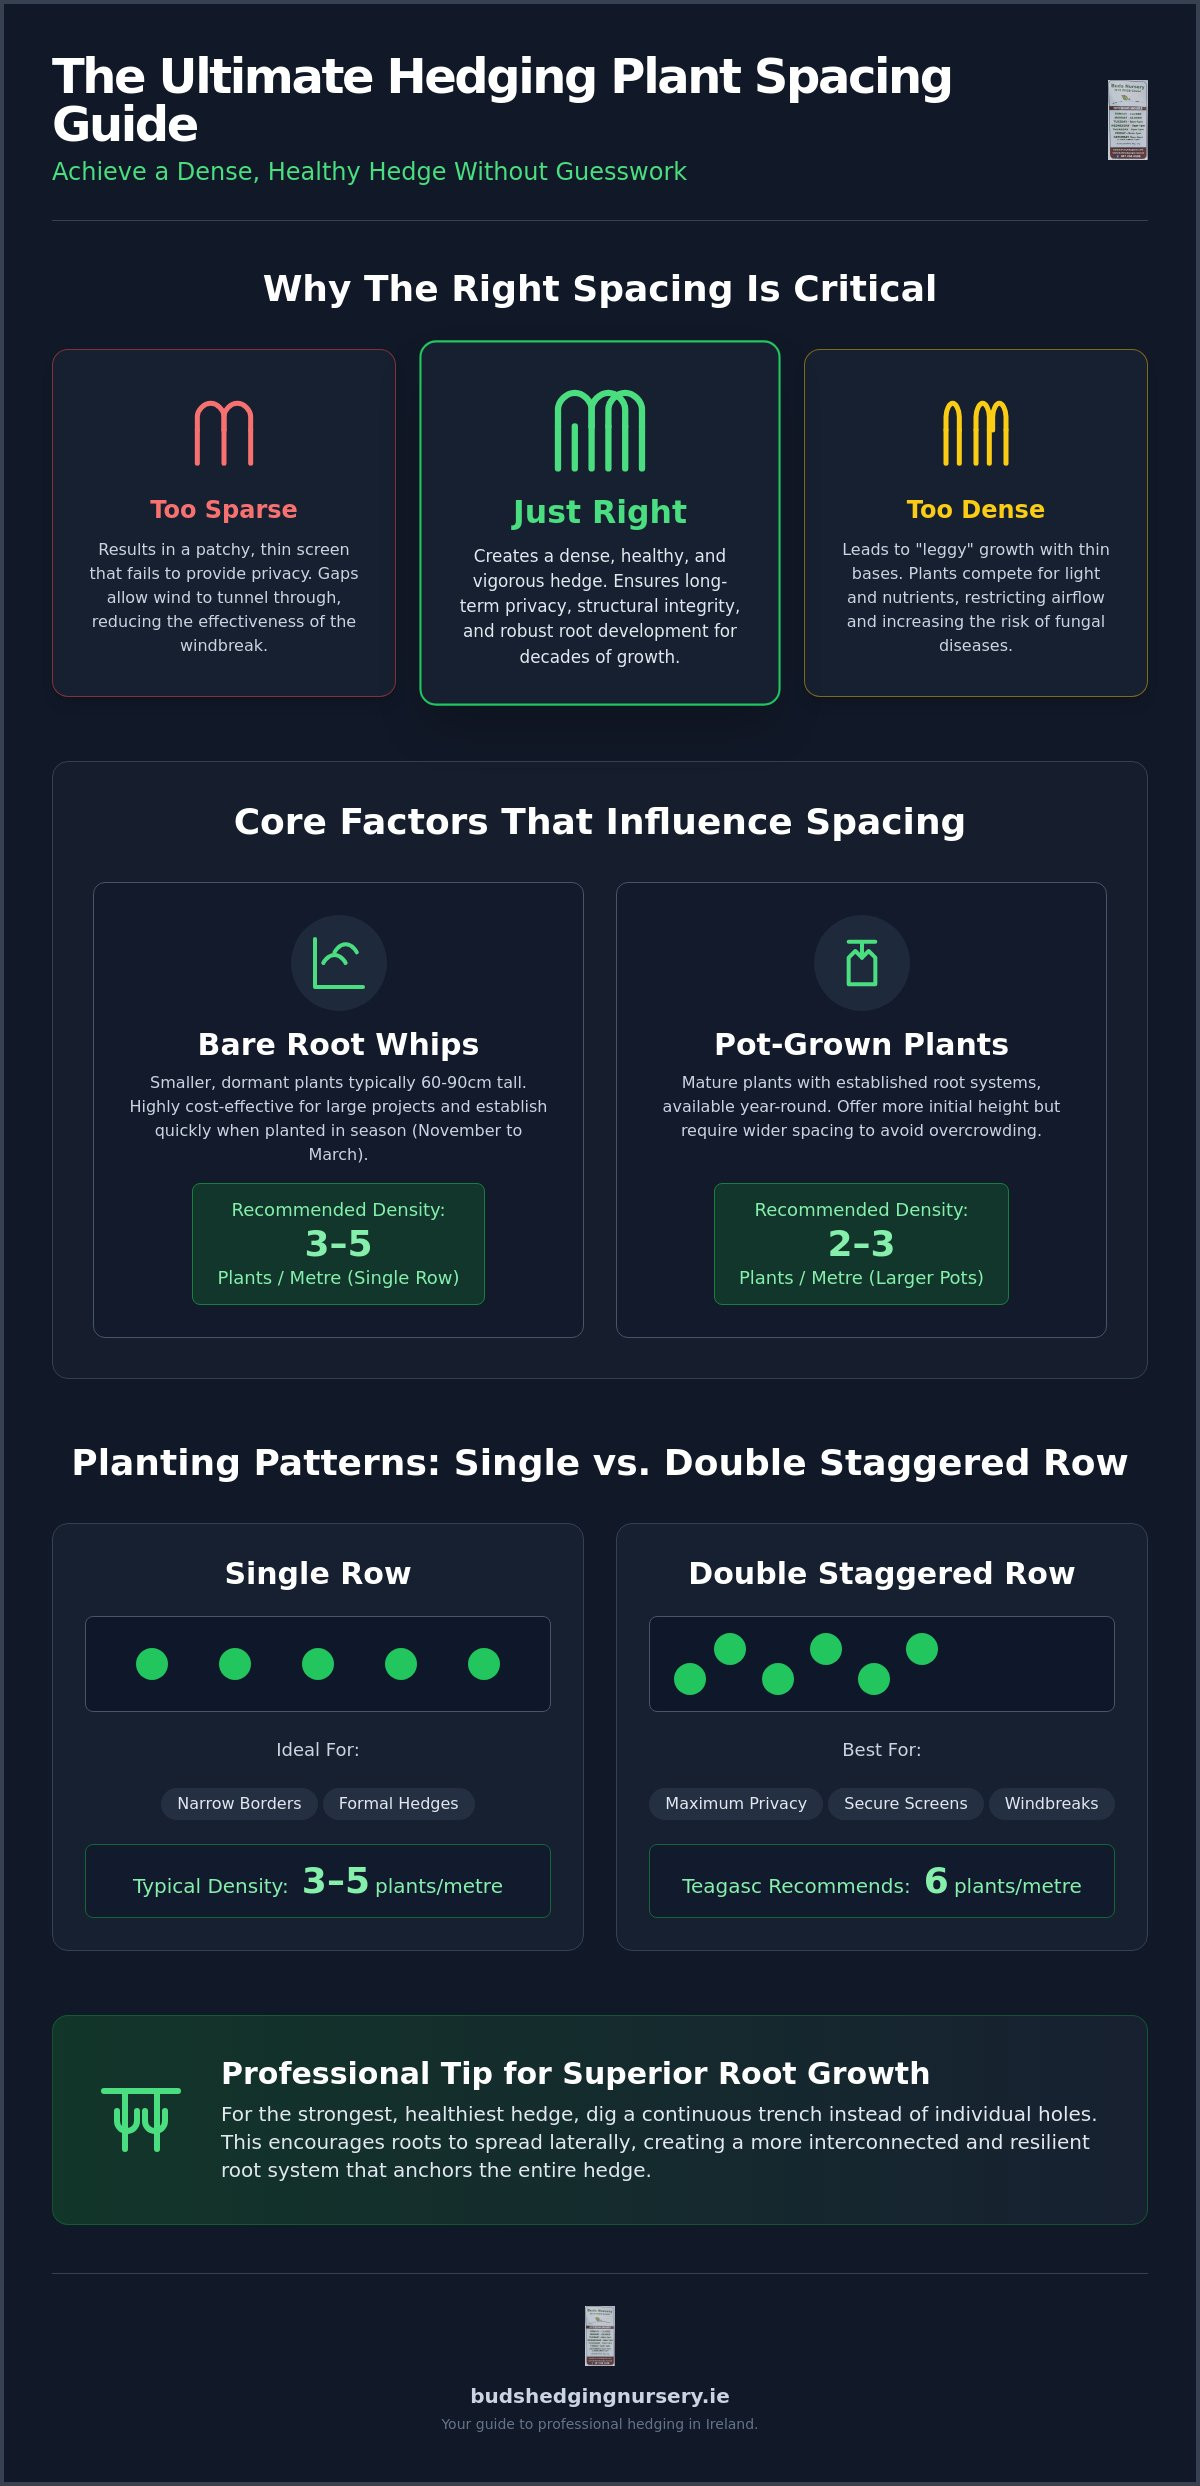
Your spacing strategy directly impacts your project budget. To calculate the total cost, you must multiply the total length of your boundary by the plants per metre. Choosing smaller “whips”—typically bare root plants around 60cm to 90cm tall—is often the most cost-effective approach. These can be planted at a higher density, such as six plants per metre, and they often establish faster than larger, more expensive specimens. Whilst large pot-grown plants offer more immediate height, they require wider spacing and a higher initial investment. This hedging plant spacing guide emphasizes that investing in a double staggered row for permanent screening provides the best long-term value, creating a thick, impenetrable barrier that lasts for decades.
Core Factors That Influence Your Spacing Strategy
Calculating the correct density for a new boundary isn’t a one-size-fits-all task. It depends heavily on the starting size of your plants and their root systems. A 60cm whip is a different beast compared to a 1.5m rootballed specimen; they have different nutritional needs and physical footprints. Your hedging plant spacing guide must account for these variations to ensure every plant has the resources to thrive without leaving unsightly gaps. Environmental conditions also play a role. Soil quality and exposure to prevailing winds can dictate whether you need to tighten your spacing to provide mutual protection or widen it to prevent competition for moisture.
Root Types: Bare Root vs Pot-Grown Spacing
Bare root plants are dormant when they arrive. They’re typically smaller and more cost-effective for large projects. For native or deciduous hedges, we usually suggest three to five plants per metre in a single row. If you’re aiming for high-density planting, the bare root tree season Ireland, which runs from November to March, is the ideal time to buy in bulk. This allows you to plant densely whilst the specimens are dormant, giving them a head start in the spring.
Pot-grown plants arrive with established root systems and are available year-round. Evergreens like Portuguese Laurel have a wider spread at the base and require more breathing room to avoid overcrowding. Planting these too close can lead to leaf drop near the stem as the inner foliage becomes shaded. Consulting the RHS hedge planting guide can help you decide between single and double rows based on the root volume and the specific pot size you’ve purchased.
Desired Maturity and Growth Rates
Growth speed dictates how much patience you need. Fast-growing species like Cherry Laurel fill gaps quickly, but slower species like Box or Yew need slightly closer spacing if you want a solid line within a few years. In the Irish climate, mild and wet winters generally help lateral spread. However, exposed sites might need denser planting to protect the inner stems from wind scorch during the establishment phase. This mutual protection helps the hedge knit together faster in tough conditions.
Your ultimate height goal also matters. A 1-metre decorative border doesn’t need the same structural density as a 3-metre privacy screen. For tall screens, a “fill-in” strategy involves planting slightly closer and pruning aggressively early on to encourage the plants to knit together. If you’re unsure which variety suits your specific site, feel free to browse our full range of hedging plants to see specific growth habits and sizing options. Getting the spacing right now ensures a professional finish that lasts for decades.
Species-Specific Spacing Guidelines for Irish Gardens
Every species has a distinct growth habit and lateral spread. This hedging plant spacing guide wouldn’t be complete without examining how these individual characteristics dictate your planting layout. Whilst a general rule of thumb works for some, choosing the wrong density for a vigorous evergreen or a delicate ornamental variety can lead to maintenance headaches later. In Ireland, our damp climate often encourages faster growth, making precise spacing even more critical for long-term health.
Laurels and Large-Leaved Evergreens
Laurels are the mainstay of privacy screening, but their spacing requirements vary significantly between varieties. Portuguese Laurel (Prunus lusitanica) is slightly more refined and slower-growing than its cousin. We recommend planting two to three specimens per metre for pot-grown plants to achieve a thick, dark green screen. If you’re using smaller bare root plants, you might increase this to four per metre.
- Cherry Laurel: This is a highly vigorous plant with massive leaves. It needs wider spacing, typically 60cm to 90cm apart. Planting it too close results in a congested mess of stems that is difficult to trim. Before deciding between the two varieties, our detailed laurel hedge Ireland comparison of Cherry vs Portuguese Laurel can help you weigh up the real-world differences in growth rates and long-term maintenance.
- Photinia Red Robin: To encourage the bright red new growth, you need light to reach the stems. Space these at two to three per metre. This prevents the centre of the hedge from becoming bare and woody.
Native Trees Scheme and Biodiversity Hedges
If you are planting under the native trees scheme plants guidelines, the rules are very specific. Official standards from Teagasc recommend planting six plants per metre for a new hedge using a double staggered row. The ACRES scheme specification is slightly different, requiring five plants per metre. Following these densities ensures grant compliance and creates a stock-proof barrier that supports local wildlife.
When mixing species like Whitethorn, Blackthorn, and Holly, aim for a density of five to six plants per metre. It’s best to use a “randomised” spacing within your native mix. This mimics natural woodland boundaries and prevents one species from dominating a single stretch of the hedge. Ensure you include a mix of at least four or five different native species to maximise biodiversity and resilience against pests.
Deciduous and Coastal Varieties
Classic deciduous boundaries like Green Beech, Copper Beech, and Hornbeam are best planted at five to seven plants per metre in a double staggered row. This ensures the leaves knit together to provide a solid screen, even in winter when the brown leaves stay on the stems. For coastal areas, Griselinia and Escallonia are excellent choices. These should be spaced at two to three plants per metre. They have a naturally bushy habit and will fill the gaps quickly if provided with a bit of shelter during their first winter. For those considering a long-lived evergreen alternative, our guide to taxus baccata hedging ireland explains the precise spacing requirements needed to achieve a dense, centuries-lasting screen with Common Yew.
Planting Patterns: Single Row vs Double Staggered Row
Choosing between a single or double row is a decision based on your available ground space and the level of privacy you require. This part of our hedging plant spacing guide focuses on the physical layout of your plants. A single row is tidy and space-efficient, whilst a double staggered row creates the dense, thick barrier most homeowners desire for boundary security. The pattern you choose significantly impacts the total number of plants you need to order, so it’s vital to decide on the layout before you start your calculations.
When to Choose a Single Row
A single row is the right choice for small urban gardens where every centimetre of ground space matters. It allows for a narrow profile that doesn’t eat into your lawn or patio area. Low-growing decorative borders, such as those using Box or Lavandula, work perfectly in this format. When sourcing plants from a specialist plant nursery Ireland, you can often find specimens already pruned to encourage lateral bushiness. To keep a single row looking full, you must prune the leading shoots early. This forces the plant to invest energy into side branches, preventing the “see-through” look that occurs with neglected single rows.
Executing the Double Staggered Pattern
For those seeking an impenetrable screen, the double staggered row is the professional standard. It requires more stock than a single row, but the result is a much deeper, more resilient boundary. This pattern is particularly essential for species like Beech and Hornbeam. Because these plants hold their brown leaves through the winter, a double row ensures there are no direct lines of sight through the stems, even in the coldest months.
To execute this pattern, follow these practical steps:
- Mark out two parallel lines using string. These should be 30cm to 40cm apart.
- Instead of planting specimens directly opposite each other, alternate the plants between the two lines to create a “W” or zigzag shape.
- Space the plants approximately 33cm apart within each row to achieve the recommended density of five to six plants per metre.
This arrangement ensures that each plant has enough light and air whilst physically blocking gaps. Whilst it nearly doubles your plant count compared to a single line, the structural integrity and privacy it provides are unmatched. If you are ready to start your project, you can view our full range of hedging stock to find the right plants for your preferred pattern.
From Planning to Planting: Establishing Your Hedge
Once you’ve used our hedging plant spacing guide to calculate your quantities, the physical work begins. Proper establishment is just as important as the initial density. A well-calculated hedge can still fail if the roots aren’t given the right start. The process moves from simple measurement to the critical first prune, which sets the foundation for a thick, bushy boundary. Following a methodical approach ensures your plants don’t just survive but thrive from the first season.
The first step is to mark the boundary with a string line. This keeps the hedge perfectly straight over long distances. Next, clear a strip of ground at least 60cm wide. Instead of digging individual holes, we recommend preparing a continuous trench. This allows roots to spread laterally without hitting the compacted sides of a small hole. Distribute your plants along the line at your calculated intervals before you start backfilling. This allows you to make minor adjustments to the spacing to ensure a uniform look before the plants are firmed into the soil.
Site Preparation and Trenching
Digging a continuous trench is superior to individual holes because it creates a uniform bed of friable soil. This is particularly helpful in heavy clay soils, which are common across many Irish gardens. If your soil is heavy, adding grit or organic matter to the bottom of the trench improves drainage and prevents root rot. Incorporating bone meal into the backfill supports rapid root establishment. Once the plants are in place, backfill the soil and firm it down with your heel to remove air pockets that can dry out the roots.
Aftercare: Protecting Your Investment
Aftercare is where many gardeners lose their momentum. Mulching is a non-negotiable step. A 5cm layer of bark mulch or well-rotted manure suppresses weeds that would otherwise compete for nutrients and moisture at the base of your hedge. Watering is equally critical. Whilst Ireland is known for its rain, dry spells in May and June can be devastating for young plants. Ensure you water deeply twice a week during these periods for the first two growing seasons.
The final step in establishment is the formative trim. For many deciduous species, cutting back the leading shoots by about a third immediately after planting encourages the plant to bush out from the base. This prevents the hedge from becoming top-heavy and ensures density from the ground up. By combining the right density from our hedging plant spacing guide with these practical establishment steps, you’ll create a professional, healthy screen that lasts for decades.
Start Your Planting Project Today
Getting the density right is the foundation of a healthy hedge. By following this hedging plant spacing guide, you’ve learned that the secret to a thick, professional screen lies in balancing root types with the correct planting pattern. Good planning pays off. Whether you’ve chosen a single row for a tight urban space or a double staggered row for maximum privacy, your focus on site preparation and aftercare will ensure your boundary thrives for decades.
At Buds Nursery Cavan, we bring over 30 years of experience as a family-owned grower to every project. Our 60-acre site holds a vast range of specialist nursery stock, from Portuguese Laurel to native species. We provide national delivery across Ireland to help you get your project moving efficiently. Browse our full range of hedging and trees at Buds Nursery Cavan. With the right planning and quality stock, you’ll soon have a dense, healthy hedge that adds character and security to your property.
Frequently Asked Questions
How many hedging plants do I need per metre for a standard garden hedge?
A standard garden hedge typically requires three to six plants per linear metre. If you are planting a single row for a narrow border, three plants per metre is usually sufficient. For a professional, dense privacy screen, a double staggered row with six plants per metre is the recommended standard. This density ensures the hedge knits together quickly without leaving unsightly gaps at the base.
What is the best spacing for a Portuguese Laurel hedge?
Portuguese Laurel should be spaced at two to three plants per metre for pot-grown specimens. This variety is more refined and slightly slower growing than Cherry Laurel, so it doesn’t require as much room to breathe. If you are using smaller bare root plants during the dormant season, you can increase the density to four plants per metre to achieve a solid screen more quickly. For a full breakdown of how Portuguese Laurel compares to Cherry Laurel in terms of growth rate, spread, and maintenance demands, see our practical guide to choosing the right laurel hedge in Ireland.
Can I plant hedging too close together?
Yes, planting too close can lead to intense nutrient competition and poor airflow. Overcrowded plants often become leggy as they stretch upwards for light, which results in a loss of foliage at the bottom of the hedge. This also increases the risk of fungal diseases amongst the leaves. Following a hedging plant spacing guide helps you avoid these issues whilst still achieving a thick, healthy boundary.
How far apart should a double staggered row be?
The two parallel lines in a double staggered row should be approximately 30cm to 40cm apart. Within each individual row, the plants should be spaced roughly 33cm apart. By alternating the plants in a zigzag pattern between the two lines, you eliminate direct lines of sight through the stems. This layout creates a much deeper and more secure boundary than a single line.
Do I need different spacing for bare root whips compared to pot-grown plants?
Bare root whips are typically planted more densely than pot-grown plants. Because whips are younger and less established, we recommend planting five to six per metre in a double staggered row. Pot-grown plants arrive with larger root systems and more lateral growth; therefore, they usually require wider spacing, typically two to three plants per metre depending on the species and the size of the pot.
How wide should a trench be for a double row of hedging?
A trench for a double row of hedging should be at least 60cm to 90cm wide. This width provides enough room for the two staggered lines and ensures the roots have plenty of loose, friable soil to expand into. Preparing a wide, continuous trench is far more effective than digging individual holes; it encourages uniform growth and better water distribution across the entire length of the hedge.
What is the minimum spacing for a native Irish hedge mix?
The minimum requirement for the ACRES scheme in Ireland is five plants per metre in a double staggered row. For a thick, stock-proof barrier outside of formal grant schemes, the standard recommendation is six plants per metre. This density ensures that species like Whitethorn and Blackthorn knit together tightly to provide essential shelter for local wildlife and security for the property boundary.
How long will it take for my hedge to fill in if I use the recommended spacing?
Most hedges take three to five years to reach full maturity and knit together completely. Fast-growing varieties like Cherry Laurel or Leylandii may provide a solid screen in just two to three seasons. Slower-growing species like Yew or Beech take a bit longer to establish. Regular formative pruning during the first two years is essential to encourage lateral growth and help the hedge fill in faster. If you are considering Yew as your chosen species, our detailed reference on taxus baccata hedging ireland covers everything you need to know about spacing, soil preparation, and long-term establishment in the Irish climate.